Getting started
⚠ The content source plugin contentlayer-source-notion is currently in Alpha and should not be used in production.
In the following guide you will learn how to create a Next.JS Blog with Contentlayer and Notion.
We assume that you've already done the Getting started and that you already have a Next.js project configured with Contentlayer.
1. Create a Notion Database
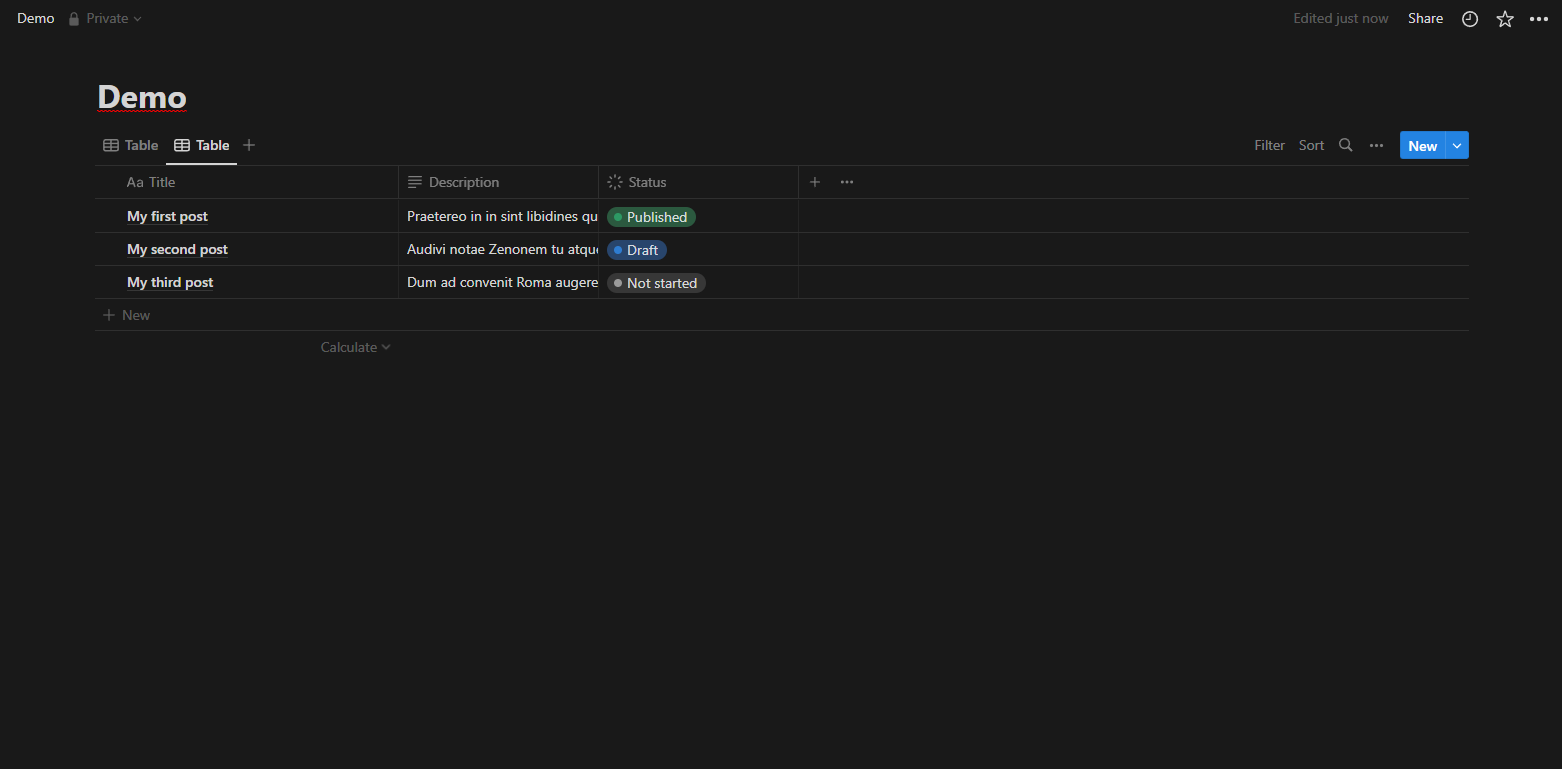
A Notion Database is a list of pages with defined properties, it provides features to easily manage your content with different type of views (table, calendar, etc).
For the purpose of this guide we will add the following properties:
- Title: The title of the post
- Date: The date of the post
- Status: The status of the post (Not started, Draft, Published)
- Created time: The creation date of the post
Do not forget to create your posts and write some content in them!
Feel free to add your own properties and tweak them to your needs. You could for example add a publication date to only publish until a certain date.
Find the database ID
Later in this guide you will need the ID of your database. You will find it in the URL: https://www.notion.so/myworkspace/50b6156388e445eaaca3a3599d6f7ade
2. Get a Notion Token
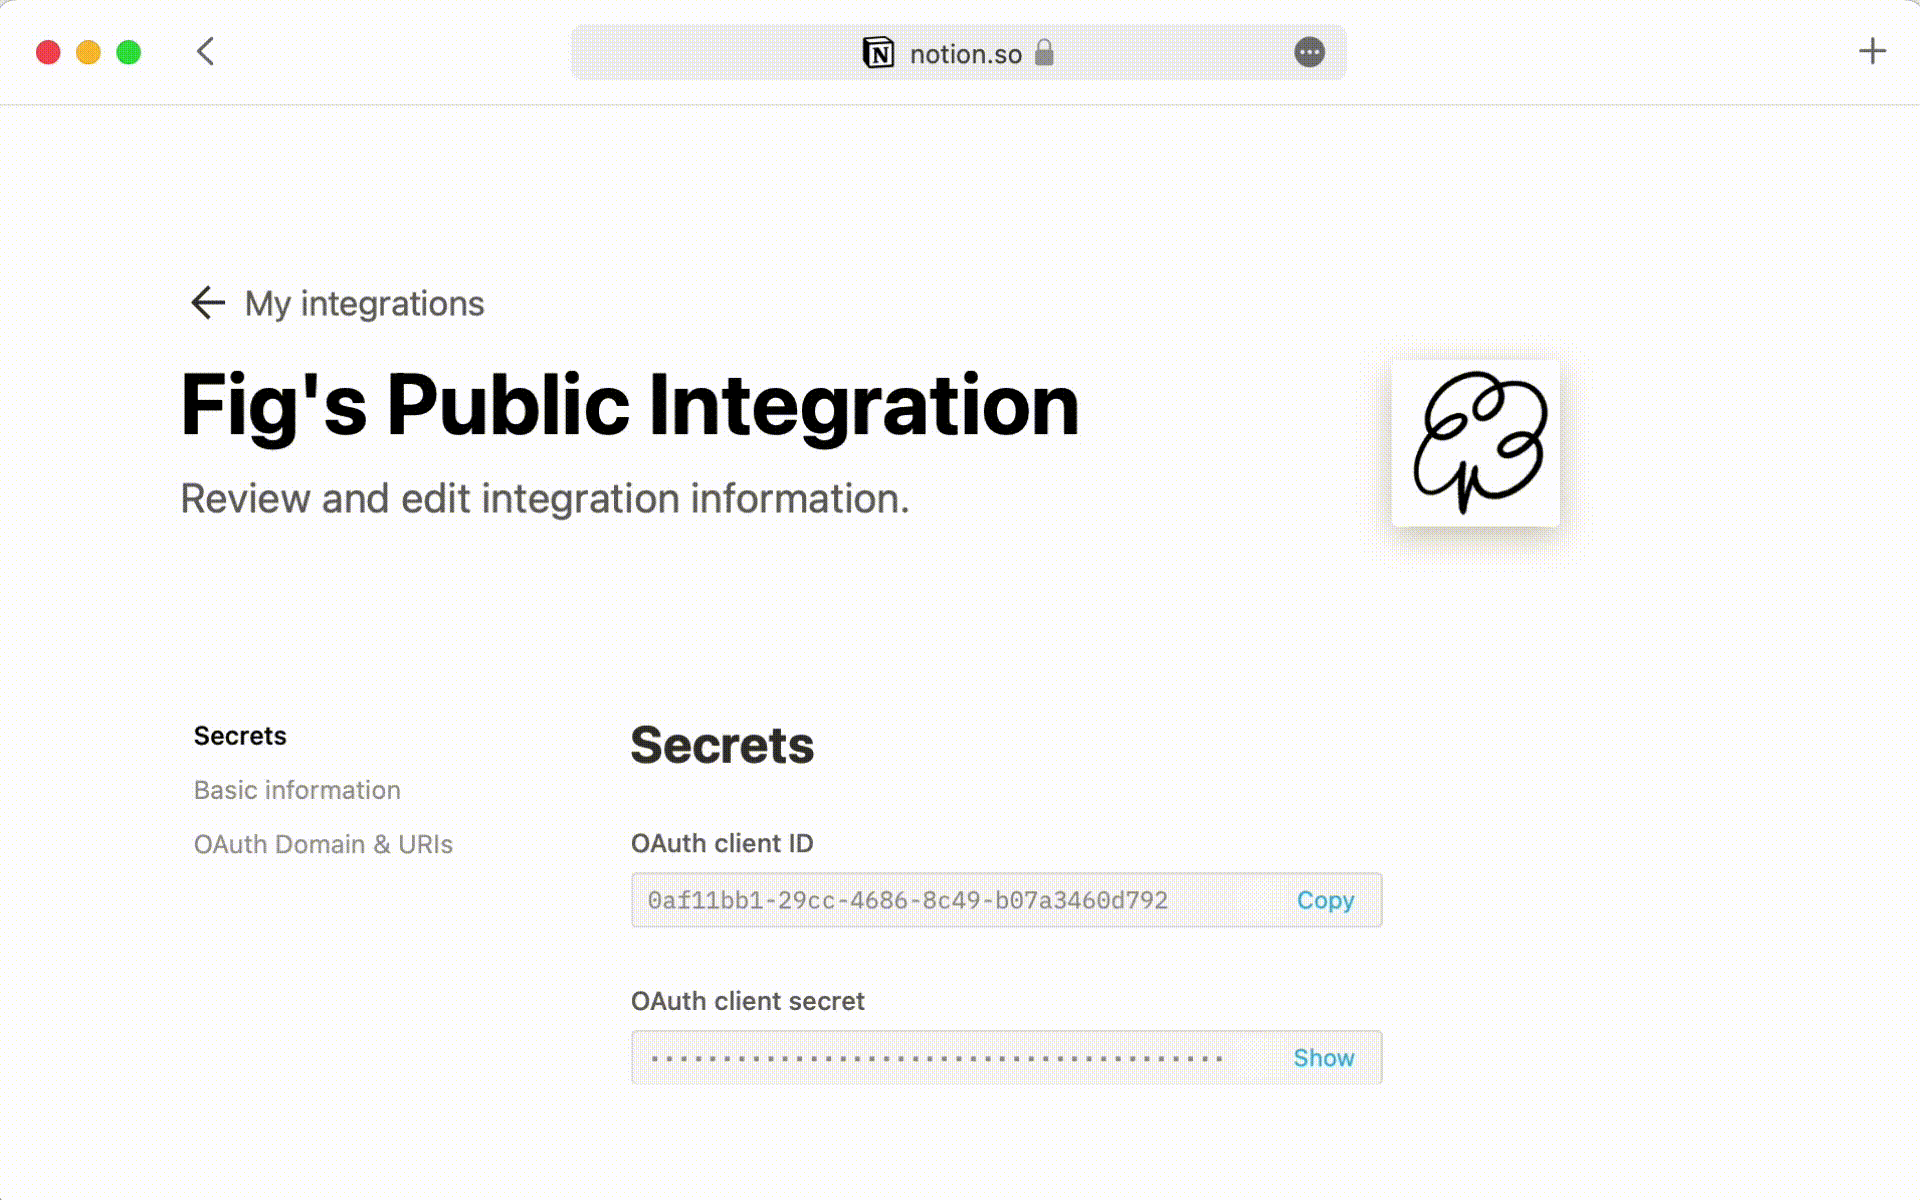
Create an Integration
In order to interact with the Notion API you will need an Internal Integration Token aka. Notion Token.
Head over the following link to create a new Notion Integration. As Contentlayer is only made for reading content, you should only add the Read capacity.
When your integration is created you will have an Internal Integration Token. Save it and keep it safe, it will be the "Notion token" that you will use to authenticate to the API.
Authorize the integration to your databases
You must explicitly give the permission to your integration to query your databases.
Click on the ••• in the top right corner of your database, then on Add connection and select your Integration.
To avoid giving access to each of your databases, you can add the integration to a parent page.
3. Setup project
Install dependencies
You will need to install the following dependencies to get started:
contentlayer-source-notion: The Notion content source implementation for Contentlayer@notionhq/client: The official Notion JS SDK
npm install contentlayer-source-notion @notionhq/client
Configure Notion source plugin
To configure the Notion Source plugin you need to create an instance of @notionhq/client Client with your Notion Token created earlier in this guide.
// contentlayer.config.js

import { makeSource, defineDatabase } from 'contentlayer-source-notion'
import { Client } from '@notionhq/client'

const client = new Client({ auth: process.env.NOTION_TOKEN })

export default makeSource({
  client,
  databaseTypes: [],
})
4. Define your database
The power of this plugin is that you do not have to define a schema, the database properties are automatically inferred to generate it for you.
In our case we want to:
- Only query published posts
- Generate the url depending using the post ID
- Change the key of
Created timeproperty todate
// contentlayer.config.js

import { makeSource, defineDatabase } from 'contentlayer-source-notion'
import * as notion from '@notionhq/client'

const client = new notion.Client({ auth: process.env.NOTION_TOKEN })

export const Post = defineDatabase(() => ({
  name: 'Post',
  databaseId: '<databaseId>',
  query: {
    filter: {
      property: 'Status',
      status: {
        equals: 'Published',
      },
    },
  },
  properties: {
    date: {
      name: 'Created time',
    },
  },
  computedFields: {
    url: {
      type: 'string',
      resolve: (post) => `/posts/${post._id}`,
    },
  },
}))

export default makeSource({
  client,
  databaseTypes: [Post],
})
With the following configuration we should ends up with the same fields as the Getting started tutorial.
title: The title of the post/pagedate: TheCreated timemapped to the keydateurl: The computed field used to generate the post url
5. Update Post Layout
In the Getting started tutorial it uses post._raw.flattenedPath to find the current post in getStaticProps.
But we are now using the post ID, we have to change this:
// pages/posts/[slug].js

import Head from 'next/head'
import Link from 'next/link'
import { format, parseISO } from 'date-fns'
import { allPosts } from 'contentlayer/generated'

export async function getStaticPaths() {
  const paths = allPosts.map((post) => post.url)
  return {
    paths,
    fallback: false,
  }
}

export async function getStaticProps({ params }) {
  const post = allPosts.find((post) => post._id === params.slug)
  return {                             ^^^^^^^^
    props: {
      post,
    },
  }
}

const PostLayout = ({ post }) => {
  return (
    <>
      <Head>
        <title>{post.title}</title>
      </Head>
      <article className="mx-auto max-w-2xl py-16">
        <div className="mb-6 text-center">
          <Link href="/">
            <a className="text-center text-sm font-bold uppercase text-blue-700">Home</a>
          </Link>
        </div>
        <div className="mb-6 text-center">
          <h1 className="mb-1 text-3xl font-bold">{post.title}</h1>
          <time dateTime={post.date} className="text-sm text-slate-600">
            {format(parseISO(post.date), 'LLLL d, yyyy')}
          </time>
        </div>
        <div className="cl-post-body" dangerouslySetInnerHTML={{ __html: post.body.html }} />
      </article>
    </>
  )
}

export default PostLayout
Run the App
You can now start the app by firing up the Next.js dev server.
npm run dev
And visit localhost:3000 in your browser. You should see a listing of your published posts!
Next steps
You now have a simple blog site with Next.js and Contentlayer managed using Notion! 🎉
This is just the beginning. Now you can dig in and add all the bells and whistles necessary to build a site with great content using Contentlayer. Here are a few suggestions:
- Jump into the conceptual guides to learn more about how Contentlayer works.
- Join our Discord community to ask questions, stay up to date, and share your work.
- Check out the examples for inspiration on what you can do with Contentlayer.
- Explore Notion source guides for learning about specific techniques.
Was this article helpful to you?
Provide feedback
Last edited on April 01, 2024.
Edit this page